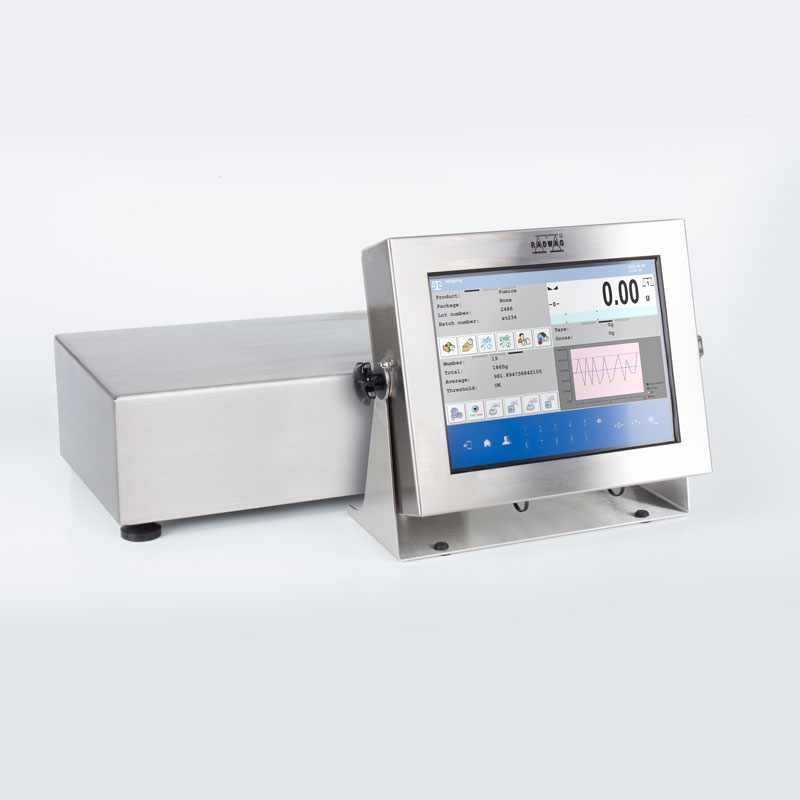
HY10.32.HRP.M2.1 High Resolution Scale

Radwag – Laboratory and Industrial Weighing Solutions
Selected language English
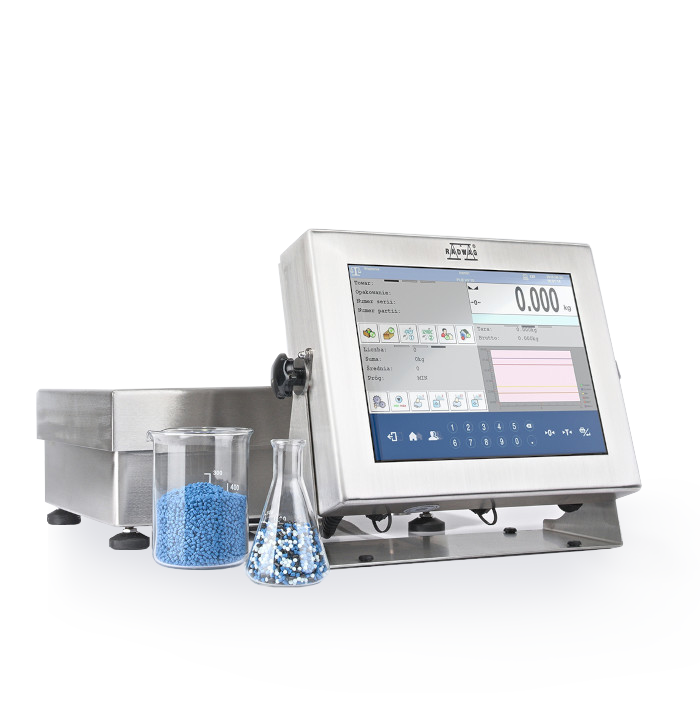
HY10.32.HRP.M2.1 High Resolution Scale
This image is for reference only.

HY10.32.HRP.M2.1 High Resolution Scale

Product code: WP-330-0015
Change the model (29)
done
Max: 32kgd: 0,1g

 360×280mm
expand_more
Max: 10kgd: 0,02g

 360×280mm
Max: 16kgd: 0,1g

 360×280mm
Max: 16kgd: 0,1g

 360×280mm
Max: 32kgd: 0,1g

 360×280mm
Max: 62kgd: 1g

 500×400mm
Max: 62kgd: 0,1g

 500×400mm
Max: 62kgd: 0,1g

 500×500mm
Max: 62kgd: 2g

 500×400mm
Max: 120kgd: 5g

 500×400mm
Max: 120kgd: 0,5g

 500×400mm
Max: 120kgd: 0,5g

 500×500mm
Max: 120kgd: 1g

 500×400mm
Max: 150kgd: 1g

 800×600mm
Max: 150kgd: 5g

 800×600mm
Max: 150kgd: 1g

 800×600mm
Max: 150kgd: 1g

 500×400mm
Max: 150kgd: 1g

 500×500mm
Max: 200 / 500 / 1000kgd: 20 / 50 / 100g

 1000×800mm
Max: 300kgd: 1g

 800×600mm
Max: 300kgd: 1g

 800×600mm
Max: 300kgd: 1g

 1000×800mm
Max: 300kgd: 1g

 1000×800mm
Max: 600kgd: 10g

 1000×800mm
Max: 600kgd: 20g

 1000×800mm
Max: 600kgd: 5g

 1000×800mm
Max: 1100kgd: 10g

 1000×800mm
Max: 1100kgd: 50g

 1000×800mm
Max: 1100kgd: 10g

 1000×800mm
Maximum capacity [Max]: 32 kg
Readability [d]: 0.1 g

close
Change the model:
HY10.10.HRP High Resolution Scale
HY10.16.HRP High Resolution Scale
HY10.16.HRP.M2.1 High Resolution Scale
HY10.32.HRP High Resolution Scale
HY10.32.HRP.M2.1 High Resolution Scale
HY10.62.HRP.M2.1 High Resolution Scale
HY10.62.HRP High Resolution Scale
HY10.62.2.HRP High Resolution Scale
HY10.62.HRP.M2.2 High Resolution Scale
HY10.120.HRP.M2.2 High Resolution Scale
HY10.120.HRP High Resolution Scale
HY10.120.2.HRP High Resolution Scale
HY10.120.HRP.M2.1 High Resolution Scale
HY10.150.1.HRP.M2.1 High Resolution Scale
HY10.150.1.HRP.M2.2 High Resolution Scale
HY10.150.1.HRP High Resolution Scale
HY10.150.HRP High Resolution Scale
HY10.150.2.HRP High Resolution Scale
HY10.1100.HRP.M3 High Resolution Scale
HY10.300.HRP High Resolution Scale
HY10.300.HRP.M2.1 High Resolution Scale
HY10.300.1.HRP.M2.1 High Resolution Scale
HY10.300.1.HRP High Resolution Scale
HY10.600.HRP.M2.1 High Resolution Scale
HY10.600.HRP.M2.2 High Resolution Scale
HY10.600.HRP High Resolution Scale
HY10.1100.HRP High Resolution Scale
HY10.1100.HRP.M2.2 High Resolution Scale
HY10.1100.HRP.M2.1 High Resolution Scale
Select all
Show me
Download
Add to compare Advanced search
Overview

HY10.32.HRP.M2.1 High Resolution Scale

 
Fast and Stable Measurement
The scale displays the final result even in one second.
 
High Maximum Capacity and Accuracy in a Single Device
On the large weighing pan of an HRP scale, you can weigh a load of 150 kg with a readability of 1 g and impressive repeatability.
 
Minimum Eccentricity Error Over the Entire Range
On the HRP scales, you can also weigh irregularly shaped items with a centre of gravity significantly displaced from the weighing pan axis.
 
Parameter Stability Over Time and After Transport
Retain the correct metrological parameters even after prolonged, intensive use and transport of the scale due to its resistant and robust mechanical design.
 
Weighing Pan Dimensions Adapted to the Accuracy of the Balance
Weigh with the highest readability of 0.02 g on the 360 x 280 mm weighing pan and with a readability of 20 g on the 1,250 x 1,000 mm weighing pan.
 

Maximum Robustness
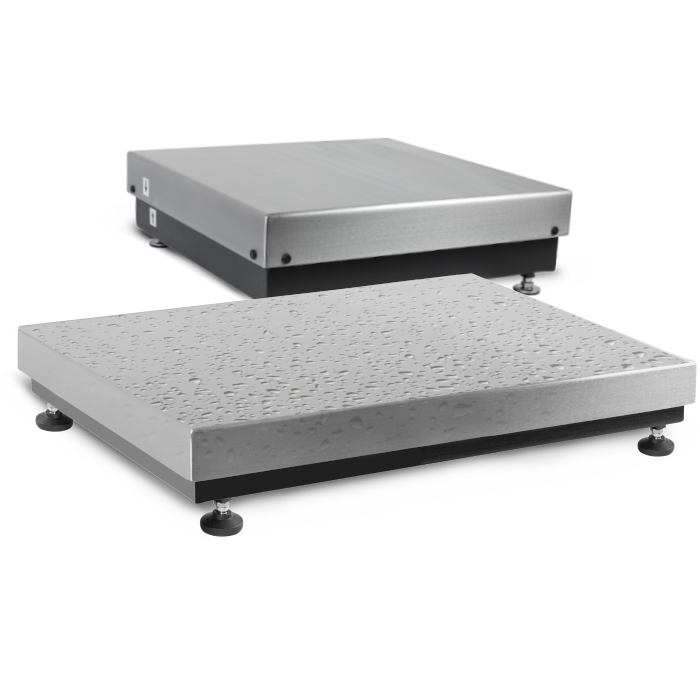
IP 67 platforms with additional sealing elements to protect against dust, dirt and moisture and can be cleaned with a pressure washer.


New, lmproved

MONO

BLOCK®

The new, taller and larger

MONO

BLOCK® enables the best repeatability and speed in its class of weighing platforms.


New HRP Platform

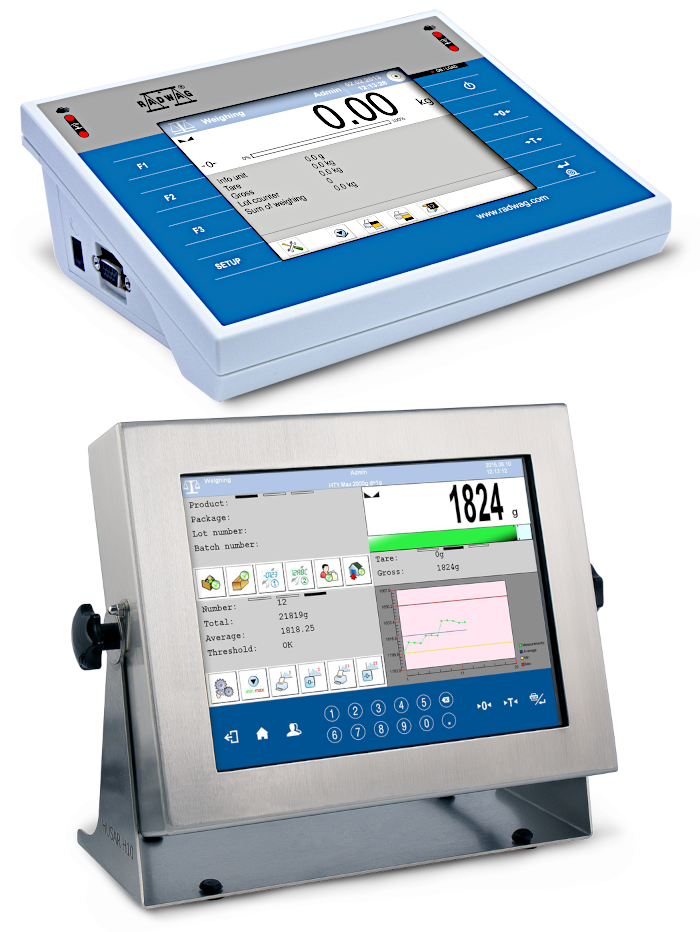
HY10 terminal is a constructional component of industrial multifunctional load cell scales, it connects with RADWAG high resolution platforms and weighing modules.
  • Readability of 0.01 g at 10 kg maximum capacity and 0,2 g at 120 kg maximum capacity.
  • Repeatability down to 0.01.
  • Higher resistance to changes in ambient conditions.
  • The platforms are so robust that they can be cleaned with a pressure washer.
  • Transport protection that stiffens the structure during transport, eliminating any unwanted stresses.
  • Platforms with a maximum capacity starting at 300 kg include transport handles, which makes them easy to move.
  • Platforms of IP 67.


PUE HY10 Terminal

HY10 terminal is a constructional component of industrial multifunctional load cell scales, it connects with RADWAG high resolution platforms and weighing modules.


High Level of Protection

HRP scales have additional sealing elements to protect them from dust, dirt and moisture.
This allows them to be cleaned with a pressure washer.


Stainless Steel in RADWAG products
Learn about the use and maintenance of stainless steel products:
Stainless Steel in RADWAG products. Standard and special applications
Datasheet
Maximum capacity [Max]

32

 kg

Minimum load

5

 g

Preload range

4

 kg

Readability [d]

0.1

 g

Verification unit [e]

1

 g

Tare range

-32

 kg

Repeatability

0.1

 g

Linearity

±0.3

 g

Stabilization time

2

 s

Adjustment

internal (automatic)


OIML Class

II


Maximum quantity of verification units

32000 e


Display

10.1″ graphic colour touchscreen


Weighing pan dimensions

360×280

 mm

Packaging dimensions

475×560×600

 mm

Net weight

24.7

 kg

Gross weight

28.7

 kg

Protection class

IP 66 / 67 construction, IP 68 / 69 terminal


Construction

aluminum


Weighing pan material

Stainless steel AISI304


Communication interface

2×RS232, 2×USB-A, Ethernet, 4 IN / 4 OUT (digital)


Optional interfaces

module Wi-Fi® 802.11 b/g/n, module Profibus (DP SLAVE), module RS485, module PROFINET (RJ45), analog output module (4-20mA, 0-20mA, 0-10V) , 12IN / 12OUT (IN – 5-24 VDC, OUT – max 30 VDC, 0.5 ADC)


Power supply

100 – 240 V AC 50/60 Hz


Operating temperature

+10 – +40

 °C

Relative humidity

15% – 80%


CE
Verification Additional fee
for verification
2 years warranty
Repeatability is expressed as the standard deviation of ten load placements.
Relative humidity under non-condensing conditions.
Stabilization time under optimal environmental conditions.
Videos
High Resolution Scales by RADWAG – Extremely Robust & Impressively Accurate
Complete Solutions for Mass Measurement in Pharma Industry
HY10 Advanced weighing terminal
RADWAG Remote Desktop
RADWAG Remote Desktop - Windows 10
Functions
Dosing

Dosing

Weighing process for which reference mass has been determined together with tolerance for its determination. Dosing tolerance is given in [%] and it is calculated in relation to the reference value thus being a permissible deviation of this process. This solution is used for weighing powders, liquids and loose materials. Dosing function performance is often supported with bargraph - load indicator. For industrial scales it is possible to use a control systems of dosing process.
Labelling

Labelling

Marking products with the right symbols contributes to quick and reliable identification. The balance/scale usually transfers product mass or product quantity to the label printer. The transferred value is printed with the following information: bar code, pictogram, content, address etc. In laboratory the labelling is performed in a semi-automatic mode, for industry in an automatic one (dynamic scales).
Plus/Minus Control

Plus/Minus Control

Control of sample's mass carried out with reference to specified MIN and MAX thresholds. The weight is considered to be correct if it is comprised within threshold values. A graphic visualisation of weighing result is displayed in a form of a bar graph.
Percent Weighing

Percent Weighing

Percent Weighing function is used for comparision of measured products with mass standard. Mass of a mass standard may be a numeric value taken from a database or it may be determined through a measurement process. Each measured product is compared to mass standard, mass of which is presumed as a model 100% ideal mass. For products weighing less than the mass standard, obtained results are lower than 100%, for products weighing more, the obtained results are greatly  exceeded.
Totalizing

Totalizing

Function adding new mass value to already obtained one. This allows to determine mass content of the mixture, being a composition of number of different consistence components. Totalizing is limited by maximum capacity parameter.
Parts counting

Parts counting

Function using mass measurement for determination of  measured items quantity. Mass of a single item is required for this process. It may be either estimated through weighment or taken from a database. For items counting the following algorithm is used: all items mass / single item mass = quantity. Function operation is supperted by a mechanism of Automatic Correction of Accuracy. This allows to update single item mass in course of the process. To a certain extend Automatic Correction of Accuracy eliminates error which may be a result of different mass values of seemingly alike single elements. For industry solutions items counting may be simultaneously carried out with checkweighing and dosing thus industry solutions feature audio signalling base informing that specified number of items has been weighed. It is possible to apply weighing systems using few platfroms of different MAX capacities and different accuracies.
Peak hold

Peak hold

Function registering the greatest temporary indication occurring in course of the weighing process. It is most often used in medical scales in order to hold the measurement indication.
Formulation

Formulation

Function supporting the mixture making process, wherein the mixture contains various components. Formulation function usually uses the balance/scale database of components. Formulation serves for monitored checkweighing of every single component with a given tolerance. It is enriched with a set of individual settings.
Statistics

Statistics

Statistiscs function registers and analyses performed measurements. This supplies the user withthe following information: Max and Min standard deviation, average value, variance, range et.
Checkweighing

Checkweighing

Checkweighing function is used for checking whether the measured sample mass is within the predefined threshold values, Low [LO] and Hgh [HI]. The thresholds are given in [g] and [kg] units. Current state of a sample being measured is signalled by means of pictorgams located on a display for laboratory balances, for industrial scales Stackligt System is used. This visual +/- inspection is in operation during segregation, control or packing process of products for which mass has bees determined with a specifaied tolerance, eg. 12860 g 961
GLP Procedures

GLP Procedures

Diagnostic function allowing to objectively document performed measurements. GLP procedures may be either presented in a short report form or extended one.
Animal weighing

Animal weighing

Process of mass determination for a product which may unwillingly reposition within the weighing pan. Mass determination in such cases requires much longer period of time when compared to typical weighing process. It is the user who defines period of time needed for control of measured product mass. The user can thus optimize the function depending on the measured product characteristics.
Differential weighing

Differential weighing

Differential weighing informs about mass variation a particular sample, wherein the said variation is a result of manufacturing processes.

Differential weighing is often applied in product control process, for which reference product parameters have been specified in order to be used as a source of comparison for the whole series.
Insuchcasestandard deviation is the information which tells about quality and completeness of a final product. For systems based on a feed-back technique such information may be used by control units.
Replaceable unit

Replaceable unit

Replaceable units.
Statistical Quality Control

Statistical Quality Control

Statistical control for determination of basic statistical criteria: maximum, minimum, standard deviation, mean values for each batch, etc.
ALIBI Memory

ALIBI Memory

"ALIBI" memory enables saving and storing up to 100000 measurements.  Measurements are saved automatically upon each pressing of the key. There is no need for any additional operations or changing settings.
The following data related with the measurements is saved: measurement date; measurement time; result (mass); tare value; operator carrying out the measurement (logged in); product name.
The software saves the measurement in a so called loop, i.e. when the measurement no. 100001 is saved, the measurement 1 gets automatically deleted from the memory.
Measurements saved to balance memory cannot be deleted.
You can preview and print out the data saved to the ALIBI database.
Transactions

Transactions

Complex weighing mode for registration of weighings that are part of transactions such as sale, purchase and warehouse transfer. You can create a new transaction using the scale. It is possible to pause the transaction or abort it.  The function supports warehouse management in an enterprise.
Documentation
Datasheet
Data Sheet Data Sheet
Data Sheet

Show me
Show me
Download
Download

Choose more product:
Show me Show me DownloadDownload
User Manuals
Software Manual - CBCP 03
Show me
Show me
Download
Download
(0.23 MB)
User Manual - PUE HY10
Show me
Show me
Download
Download
(2.19 MB)
Start up Guide
Start up Guide
Show me
Show me
Download
Download
(1.38 MB)
User Manual - HY10 multifunctional scales
Show me
Show me
Download
Download
(1.88 MB)
 Software Manual - PUE HY10
Software Manual - PUE HY10
Show me
Show me
Download
Download
(7.10 MB)
Software Manual - Radwag-Mass -Node-RED
Show me
Show me
Download
Download
(0.57 MB)
 Software Manual - PROFIBUS communication protocol of PUE HY10
Software Manual - PROFIBUS communication protocol of PUE HY10
Show me
Show me
Download
Download
(0.65 MB)
Quick start
Quick start
Show me
Show me
Download
Download
(2.47 MB)
User Manual - Connecting External Platform
Show me
Show me
Download
Download
(0.99 MB)
Software Manual - PROFINET communication protocol of HRP platforms
Show me
Show me
Download
Download
(2.02 MB)
User Manual - HRP Weighing Platforms
Show me
Show me
Download
Download
(2.21 MB)
 Software Manual - PROFINET communication protocol of PUE HY10
Software Manual - PROFINET communication protocol of PUE HY10
Show me
Show me
Download
Download
(1.82 MB)
Conformity Declarations
Conformity Declaration
Show me
Show me
Download
Download
(0.12 MB)
Publications and Brochures
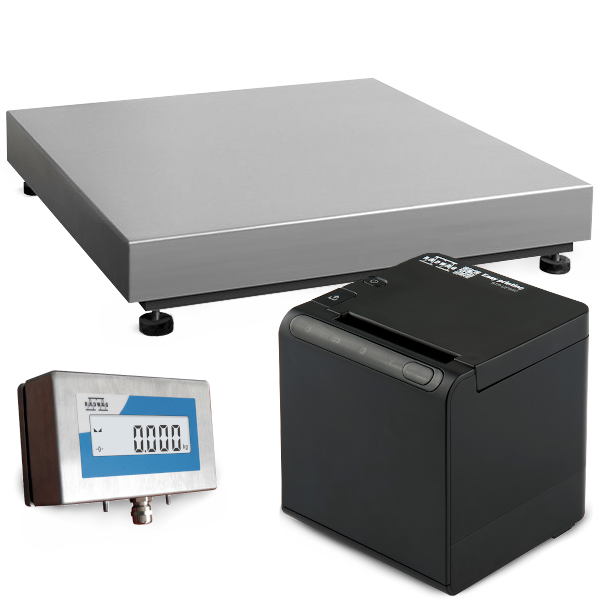
RTP Thermal Receipt Printer
Show me
Show me
Download
Download
(1.64 MB)
THBR System 2.0
THBR System 2.0
Show me
Show me
Download
Download
(5.17 MB)
HRP High Resolution Scales
Show me
Show me
Download
Download
(9.41 MB)
Stainless Steel in RADWAG products. Standard and special applications
Show me
Show me
Download
Download
(2.23 MB)
PUE HY10 - Weighing Terminal
Show me
Show me
Download
Download
(2.55 MB)
Accessories
R-LAB

Accessories

Additional modules

Audit Trail3
Workflow - additional module3
RDA (RADWAG Data Access)3
RES Radwag Extended SI Module3

Newsletter

Subscribe to the newsletter if you would like to receive RADWAG news.

View more
Radwag Balances and Scales
Torunska 5
26-600 Radom
Poland
tel.: +48 48 386 60 00
e-mail: export@radwag.com
TIN: PL7960000327
Vimeo Radwag YouTube Radwag Facebook Radwag LinkedIn Radwag
© 2025 RADWAG Balances and Scales. All rights reserved.

Select language

×
Change language AlbanianAlbanian
Change language DanishDanish
Change language NederlandseNederlandse
Change language EstonianEstonian
Change language FinnishFinnish
Change language HungarianHungarian
Change language IcelandicIcelandic
Change language KazakhKazakh
Change language LatvianLatvian
Change language LithuanianLithuanian
Change language MacedonianMacedonian
Change language NorwegianNorwegian
Change language PortuguesePortuguese
Change language RomanianRomanian
Change language RussianRussian
Change language SlovakSlovak
Change language SlovenianSlovenian
Change language SwedishSwedish
Change language UkrainianUkrainian
Change language SerbianSerbian
Change language MontenegrinMontenegrin
Change language page on Deutsch Deutsch
Change language page on Español Español
Change language page on Français Français
Change language page on Italiano Italiano
Change language page on Japanese (日本語) Japanese (日本語)
Change language page on Polski Polski
Change language page on Türkiye Türkiye
Česky
Português (Brasil)
Change website to USA USA
Change language page on 中文 中文
Presentations Presentations Presentations
Subscribe Subscribe Subscribe
Radwag in Facebook Radwag in Facebook Facebook
Radwag in YouTube Radwag in YouTube Youtube
Radwag in Vimeo Radwag in Vimeo Vimeo
Radwag in LinkedIn Radwag in LinkedIn LinkedIn
Webinars Radwag Webinars Radwag Webinars
close
E-mail:
Company name:
Name:
I consent to the processing of my personal data for marketing purposes by Radwag Wagi Elektroniczne Witold Lewandowski.
I consent to receive marketing and product-related messages by electronic means from Radwag Wagi Elektroniczne Witold Lewandowski.
I have read the Privacy Policy of RADWAG Wagi Elektroniczne Witold Lewandowski.
lock_openI want to access the files
close
Slide to go back ↩
close