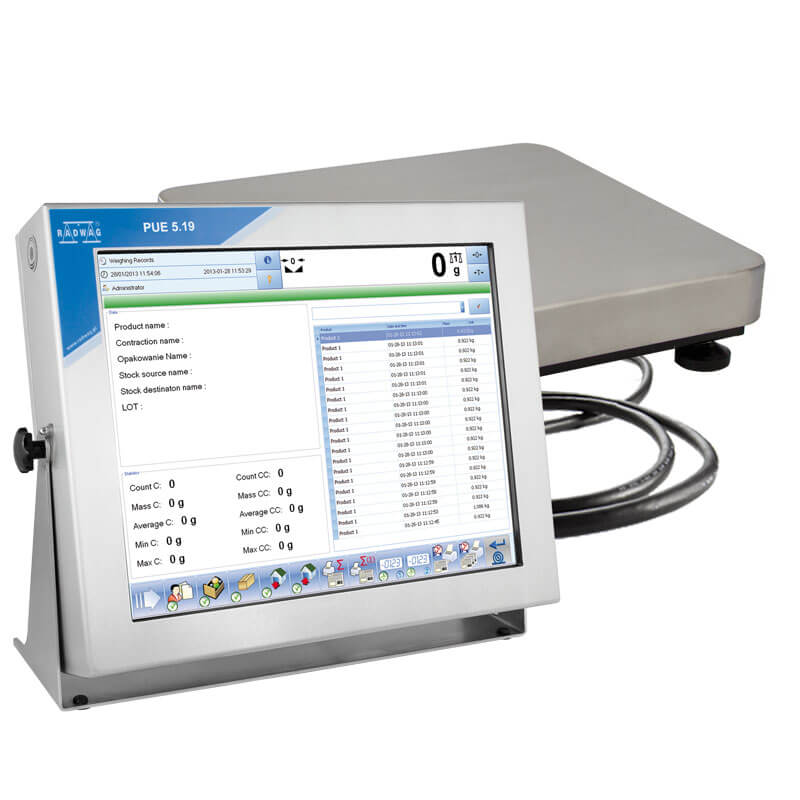
TMX19R.6.F1.K Multifunctional Scale
Radwag – Laboratory and Industrial Weighing Solutions
Selected language English
TMX19R.6.F1.K Multifunctional Scale
This image is for reference only.

TMX19R.6.F1.K Multifunctional Scale

Product code: WP-118-0029
Change the model (54)
done
Max: 6kgd: 2g

 300×300mm
expand_more
Max: 6kgd: 2g

 300×300mm
Max: 6kgd: 2g

 300×300mm
Max: 6kgd: 2g

 300×300mm
Max: 6kgd: 2g

 300×300mm
Max: 6kgd: 2g

 300×300mm
Max: 15kgd: 5g

 300×300mm
Max: 15kgd: 5g

 300×300mm
Max: 15kgd: 5g

 300×300mm
Max: 15kgd: 5g

 300×300mm
Max: 15kgd: 5g

 300×300mm
Max: 15kgd: 5g

 300×300mm
Max: 30kgd: 10g

 300×300mm
Max: 30kgd: 10g

 400×500mm
Max: 30kgd: 10g

 300×300mm
Max: 30kgd: 10g

 300×300mm
Max: 30kgd: 10g

 400×500mm
Max: 30kgd: 10g

 400×500mm
Max: 30kgd: 10g

 400×500mm
Max: 30kgd: 10g

 300×300mm
Max: 30kgd: 10g

 400×500mm
Max: 30kgd: 10g

 300×300mm
Max: 30kgd: 10g

 300×300mm
Max: 30kgd: 10g

 400×500mm
Max: 60kgd: 20g

 400×500mm
Max: 60kgd: 20g

 400×500mm
Max: 60kgd: 20g

 400×500mm
Max: 60kgd: 20g

 400×500mm
Max: 60kgd: 20g

 400×500mm
Max: 60kgd: 20g

 400×500mm
Max: 150kgd: 50g

 400×500mm
Max: 150kgd: 50g

 400×500mm
Max: 150kgd: 50g

 500×700mm
Max: 150kgd: 50g

 500×700mm
Max: 150kgd: 50g

 400×500mm
Max: 150kgd: 50g

 400×500mm
Max: 150kgd: 50g

 500×700mm
Max: 150kgd: 50g

 500×700mm
Max: 150kgd: 50g

 500×700mm
Max: 150kgd: 50g

 400×500mm
Max: 150kgd: 50g

 400×500mm
Max: 150kgd: 50g

 500×700mm
Max: 300kgd: 100g

 500×700mm
Max: 300kgd: 100g

 400×500mm
Max: 300kgd: 100g

 500×700mm
Max: 300kgd: 100g

 400×500mm
Max: 300kgd: 100g

 500×700mm
Max: 300kgd: 100g

 400×500mm
Max: 300kgd: 100g

 500×700mm
Max: 300kgd: 100g

 400×500mm
Max: 300kgd: 100g

 400×500mm
Max: 300kgd: 100g

 500×700mm
Max: 300kgd: 100g

 400×500mm
Max: 300kgd: 100g

 500×700mm
Maximum capacity [Max]: 6 kg
Readability [d]: 2 g

close
Change the model:
TMX15IR.6.F1.K Multifunctional Scale
TMX15R.6.F1.K Multifunctional Scale
TMX19R.6.F1.K Multifunctional Scale
TMX19C.6.F1.K Multifunctional Scale
TMX19IR.6.F1.K Multifunctional Scale
TMX15C.6.F1.K Multifunctional Scale
TMX15R.15.F1.K Multifunctional Scale
TMX19IR.15.F1.K Multifunctional Scale
TMX19R.15.F1.K Multifunctional Scale
TMX15C.15.F1.K Multifunctional Scale
TMX15IR.15.F1.K Multifunctional Scale
TMX19C.15.F1.K Multifunctional Scale
TMX15C.30.F1.K Multifunctional Scale
TMX15C.30.C2.K Multifunctional Scale
TMX15IR.30.F1.K Multifunctional Scale
TMX19C.30.F1.K Multifunctional Scale
TMX15IR.30.C2.K Multifunctional Scale
TMX15R.30.C2.K Multifunctional Scale
TMX19C.30.C2.K Multifunctional Scale
TMX15R.30.F1.K Multifunctional Scale
TMX19R.30.C2.K Multifunctional Scale
TMX19IR.30.F1.K Multifunctional Scale
TMX19R.30.F1.K Multifunctional Scale
TMX19IR.30.C2.K Multifunctional Scale
TMX15R.60.C2.K Multifunctional Scale
TMX19C.60.C2.K Multifunctional Scale
TMX19R.60.C2.K Multifunctional Scale
TMX19IR.60.C2.K Multifunctional Scale
TMX15C.60.C2.K Multifunctional Scale
TMX15IR.60.C2.K Multifunctional Scale
TMX19IR.150.C2.K Multifunctional Scale
TMX15R.150.C2.K Multifunctional Scale
TMX15C.150.C3.K Multifunctional Scale
TMX15R.150.C3.K Multifunctional Scale
TMX19R.150.C2.K Multifunctional Scale
TMX15C.150.C2.K Multifunctional Scale
TMX19R.150.C3.K Multifunctional Scale
TMX15IR.150.C3.K Multifunctional Scale
TMX19C.150.C3.K Multifunctional Scale
TMX15IR.150.C2.K Multifunctional Scale
TMX19C.150.C2.K Multifunctional Scale
TMX19IR.150.C3.K Multifunctional Scale
TMX19R.300.C3.K Multifunctional Scale
TMX15C.300.C2.K Multifunctional Scale
TMX15IR.300.C3.K Multifunctional Scale
TMX15IR.300.C2.K Multifunctional Scale
TMX19C.300.C3.K Multifunctional Scale
TMX19C.300.C2.K Multifunctional Scale
TMX19IR.300.C3.K Multifunctional Scale
TMX19IR.300.C2.K Multifunctional Scale
TMX15R.300.C2.K Multifunctional Scale
TMX15R.300.C3.K Multifunctional Scale
TMX19R.300.C2.K Multifunctional Scale
TMX15C.300.C3.K Multifunctional Scale
Select all
Show me
Download
Add to compare Advanced search
Overview
 

TMX19R.6.F1.K Multifunctional Scale

 
Multifunctional scales TMX is designed to fast and precise determination of mass in industrial conditions. 


TMX

Multifunctional scales TMX comprises terminal PUE 5 and a weighing platform.
 
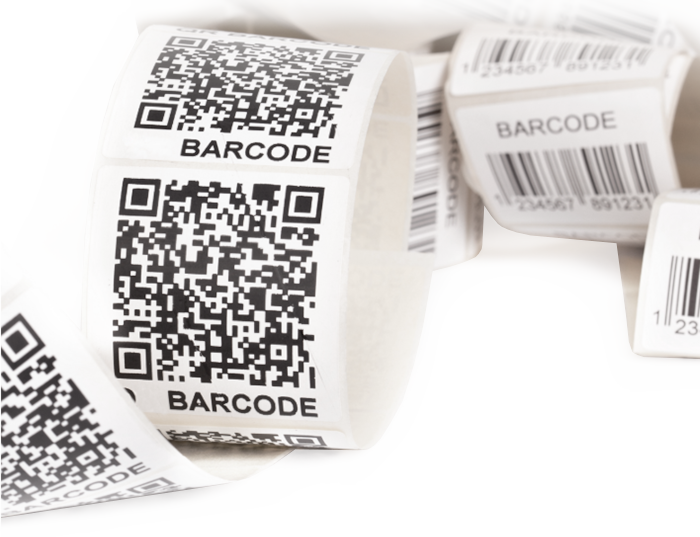
Labelling system series TMX is used to print labels for marking weighted goods e.g. in the process of packing. 

The program can generate standard labels for single goods.


Functionality of the software:

  • a function of weight control (weighing  control + / -),
  • previewing weighments carried out on weighing terminal as a table of weighments,
  • simplified reporting module allowing the report to be generated,
  • creation of label templates from labels in weighing terminal,
  • identification of goods by using the code EAN-13 and EAN-128,
  • quick search using the range of barcode scanner,
  • the availability of databases: the operators, products, clients, warehouses, tares (packages), etc. 
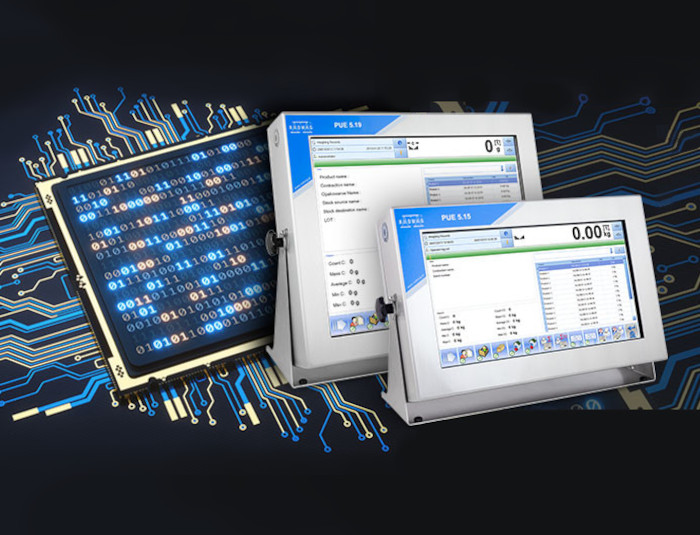
The application enables measurements execution and their record into a local database or on the server. Networked terminals allow transmission of the measurements to the parent database installed on the server. 
 
The ability to work with a computer program E2R SYSTEM.


Terminal types:

  • PUE 5.15R, PUE 5.19R – resistive touch screen technology. Protection class IP 66. High resistance to moisture and dust. In comparison to remaining models, limited brightness and lower resistance to shocks and scratches. Possibility of operation using gloves preventing scratches (latex, material).
     
  • PUE 5.15IR, PUE 5.19IR – infrared touch screen technology. Protection class IP 66/67. Very high brightness and readability level. High resistance to moisture and dust. High mechanical resistance, possibility of operation using gloves (made of latex, material or even steel chain).
     
  • PUE 5.15C, PUE 5.19C – capacitive touch screen technology. Protection class IP 66/67/69. High brightness and readability level. High resistance to moisture and dust, good mechanical resistance. Absolute precision of touch detection, sensing multiple points of touch (multi-touch).


Stainless Steel in RADWAG products
Learn about the use and maintenance of stainless steel products:
Stainless Steel in RADWAG products. Standard and special applications
Datasheet
Maximum capacity [Max]

6

 kg

Minimum load

40

 g

Readability [d]

2

 g

Tare range

-6

 kg

Max readability for non-verified scale

0.2

 g

OIML Class

III


Display

15.6” graphic colour touchscreen


Cable length

1

 m

Weighing pan dimensions

300×300

 mm

Controling device dimensions

590×430×240

 mm

Packaging dimensions

470×590×410

 mm

Protection class

IP 43 construction, IP 68 (1h max)/69 terminal


Communication interface

4×USB 2.0 (2×USB-A, 2×M12 4P), Ethernet - 2×10/100/1000 Mbit (2×RJ45 hermetic), Profibus DP (operation mode: slave), 2×RS232, RS485 (2×M12 8P), 4IN / 4OUT (2×ports M12 8P or 2×cables fed through the cable gland)


Optional interfaces

external buttons PRINT, TARE, START - terminal with 4IN/4OUT (M12 8P connector) is required, additional weighing platform module - max. 3 pcs, metrological parameters as in the main weighing platform


Power supply

100 – 240 V AC 50/60 Hz


Power consumption

45 W


Operating temperature

0 – +40

 °C

Relative humidity

10% – 85% RH no condensation


Verification Extra payment
for verification
CE
2 years warranty
Functions
Dosing

Dosing

Weighing process for which reference mass has been determined together with tolerance for its determination. Dosing tolerance is given in [%] and it is calculated in relation to the reference value thus being a permissible deviation of this process. This solution is used for weighing powders, liquids and loose materials. Dosing function performance is often supported with bargraph - load indicator. For industrial scales it is possible to use a control systems of dosing process.
Labelling

Labelling

Marking products with the right symbols contributes to quick and reliable identification. The balance/scale usually transfers product mass or product quantity to the label printer. The transferred value is printed with the following information: bar code, pictogram, content, address etc. In laboratory the labelling is performed in a semi-automatic mode, for industry in an automatic one (dynamic scales).
Plus/Minus Control

Plus/Minus Control

Control of sample's mass carried out with reference to specified MIN and MAX thresholds. The weight is considered to be correct if it is comprised within threshold values. A graphic visualisation of weighing result is displayed in a form of a bar graph.
Parts counting

Parts counting

Function using mass measurement for determination of  measured items quantity. Mass of a single item is required for this process. It may be either estimated through weighment or taken from a database. For items counting the following algorithm is used: all items mass / single item mass = quantity. Function operation is supperted by a mechanism of Automatic Correction of Accuracy. This allows to update single item mass in course of the process. To a certain extend Automatic Correction of Accuracy eliminates error which may be a result of different mass values of seemingly alike single elements. For industry solutions items counting may be simultaneously carried out with checkweighing and dosing thus industry solutions feature audio signalling base informing that specified number of items has been weighed. It is possible to apply weighing systems using few platfroms of different MAX capacities and different accuracies.
Formulation

Formulation

Function supporting the mixture making process, wherein the mixture contains various components. Formulation function usually uses the balance/scale database of components. Formulation serves for monitored checkweighing of every single component with a given tolerance. It is enriched with a set of individual settings.
Statistics

Statistics

Statistiscs function registers and analyses performed measurements. This supplies the user withthe following information: Max and Min standard deviation, average value, variance, range et.
Checkweighing

Checkweighing

Checkweighing function is used for checking whether the measured sample mass is within the predefined threshold values, Low [LO] and Hgh [HI]. The thresholds are given in [g] and [kg] units. Current state of a sample being measured is signalled by means of pictorgams located on a display for laboratory balances, for industrial scales Stackligt System is used. This visual +/- inspection is in operation during segregation, control or packing process of products for which mass has bees determined with a specifaied tolerance, eg. 12860 g 961
Documentation
Datasheet
Data Sheet Data Sheet
Data Sheet

Show me
Show me
Download
Download

Choose more product:
Show me Show me DownloadDownload
User Manuals
Start up Guide
Start up Guide
Show me
Show me
Download
Download
(1.02 MB)
User Manual - TMX
User Manual - TMX
Show me
Show me
Download
Download
(7.31 MB)
Quick start
Quick start
Show me
Show me
Download
Download
(2.47 MB)
Conformity Declarations
Conformity Declaration
Show me
Show me
Download
Download
(0.04 MB)
Publications and Brochures
RTP Thermal Receipt Printer
Show me
Show me
Download
Download
(1.64 MB)
Stainless Steel in RADWAG products. Standard and special applications
Show me
Show me
Download
Download
(2.23 MB)
Radwag Balances and Scales
Torunska 5
26-600 Radom
Poland
tel.: +48 48 386 60 00
e-mail: export@radwag.com
TIN: PL7960000327
Vimeo Radwag YouTube Radwag Facebook Radwag LinkedIn Radwag
© 2024 RADWAG Balances and Scales. All rights reserved.

Select language

×
Change language AlbanianAlbanian
Change language DanishDanish
Change language NederlandseNederlandse
Change language EstonianEstonian
Change language FinnishFinnish
Change language HungarianHungarian
Change language IcelandicIcelandic
Change language KazakhKazakh
Change language LatvianLatvian
Change language LithuanianLithuanian
Change language MacedonianMacedonian
Change language NorwegianNorwegian
Change language PortuguesePortuguese
Change language RomanianRomanian
Change language RussianRussian
Change language SlovakSlovak
Change language SlovenianSlovenian
Change language SwedishSwedish
Change language UkrainianUkrainian
Change language SerbianSerbian
Change language MontenegrinMontenegrin
Change language page on Deutsch Deutsch
Change language page on Español Español
Change language page on Français Français
Change language page on Italiano Italiano
Change language page on Polski Polski
Change language page on Türkiye Türkiye
Česky
Português (Brasil)
Change website to USA USA
Change language page on 中文 中文
Presentations Presentations Presentations
Subscribe Subscribe Subscribe
Radwag in Facebook Radwag in Facebook Facebook
Radwag in YouTube Radwag in YouTube Youtube
Radwag in Vimeo Radwag in Vimeo Vimeo
Radwag in LinkedIn Radwag in LinkedIn LinkedIn
Webinars Radwag Webinars Radwag Webinars
close
E-mail:
Company name:
Name:
I consent to the processing of my personal data for marketing purposes by Radwag Wagi Elektroniczne Witold Lewandowski.
I consent to receive marketing and product-related messages by electronic means from Radwag Wagi Elektroniczne Witold Lewandowski.
I have read the Privacy Policy of RADWAG Wagi Elektroniczne Witold Lewandowski.
lock_openI want to access the files
close
Slide to go back ↩