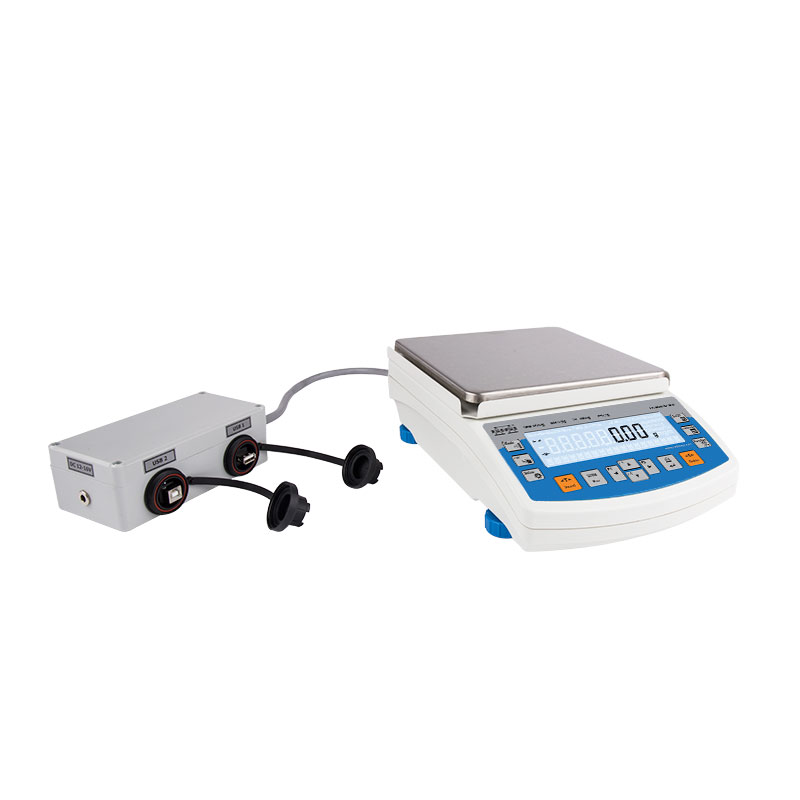
Balanza de precisión PS 4500.R2.M.H
Radwag Balanzas Electrónicas
Selected language Español
Balanza de precisión PS 4500.R2.M.H
This image is for reference only.

Balanza de precisión PS 4500.R2.M.H

Código de producto: WL-221-0025
Change the model (10)
done
Max: 4500gd: 0,01g

 195×195mm
expand_more
Max: 200 / 2000gd: 0,001 / 0,01g

 ø100mm
Max: 210gd: 0,001g

 ø100mm
Max: 360gd: 0,001g

 ø100mm
Max: 600gd: 0,001g

 ø100mm
Max: 750gd: 0,001g

 ø100mm
Max: 1000gd: 0,001g

 ø100mm
Max: 2100gd: 0,01g

 195×195mm
Max: 3500gd: 0,01g

 195×195mm
Max: 6100gd: 0,01g

 195×195mm
Maxima capacidad [Max]: 4500 g
Legibilidad [d]: 0,01 g

close
Change the model:
Balanza de precisión PS 200/2000.R2.H
Balanza de precisión PS 210.R2.H
Balanza de precisión PS 360.R2.H
Balanza de precisión PS 600.R2.H
Balanza de precisión PS 750.R2.H
Balanza de precisión PS 1000.R2.H
Balanza de precisión PS 2100.R2.M.H
Balanza de precisión PS 3500.R2.M.H
Balanza de precisión PS 4500.R2.M.H
Balanza de precisión PS 6100.R2.M.H
Select all
Ver
Guardar
Para comparar Búsqueda avanzada
Descripción
 

Balanza de precisión PS 4500.R2.M.H

 
PS R2.H series balances redefine the level of standard precision balances. 
Not only do they share all the features of R series balances, but can also work in adverse operating conditions (condensed dust, drops of water falling down at different angles typical for IP 54).


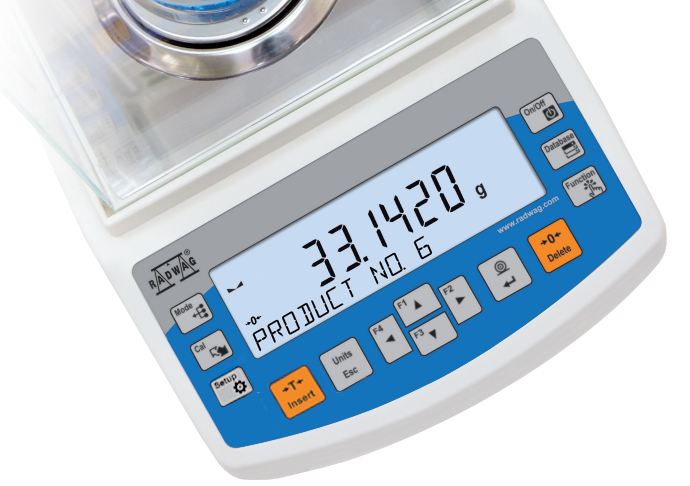
LCD display

These balances are equipped with innovative LCD display allowing for clear and legible presentation of a measurement result. Moreover, it offers new text line which supplies the user with some additional messages and information, e.g. product name or tare value.

PS.R.H balances are offered with round pans of two possible sizes: ø115mm and ø170mm. Balances with pans of a smaller size feature draft shield as well.
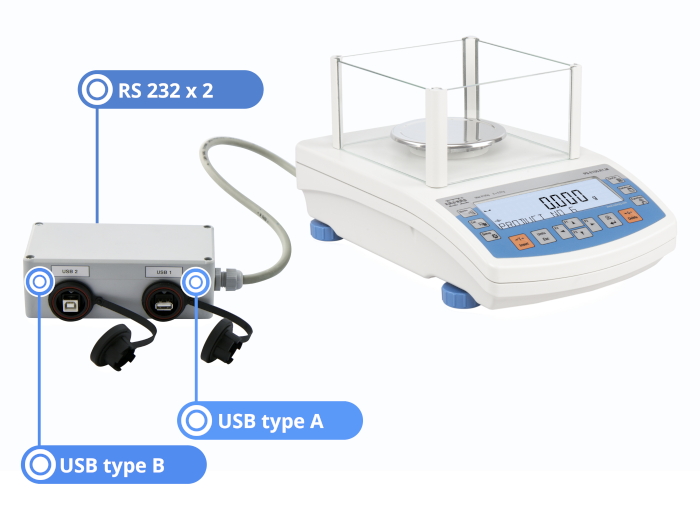


Interfaces

Additional asset of PS R2.H balances are their interfaces build-in a hermetic closed housing which is separated from the balance.

The interfaces include 2×RS 232, USB type A, USB type B, and Wireless Connection optionally.

Balance housing is made of plastic, whereas its pan of stainless steel.


Pesaje debajo del platillo
El pesaje debajo del platillo solo será posible en una balanza que está equipada con esta función en el proceso de producción. La necesidad de tal funcionalidad (de pago adicional) se debe informar en la etapa de pedido. 


Stainless Steel in RADWAG products
Learn about the use and maintenance of stainless steel products:
Stainless Steel in RADWAG products. Standard and special applications
Datos tecnicos
Maxima capacidad [Max]

4500

 g

Minima capacidad

500

 mg

Legibilidad [d]

0,01

 g

Rango de tara

-4500

 g

Repetibilidad (Max)

0,008

 g

Repetibilidad (5% Max)

0,005

 g

Linealidad

±0,03

 g

Tiempo de estabilización

1,5

 s

Calibración

interna (automatica)


Sistema de nivelación

manual


Pantalla

LCD (con retroiluminación)


Elementos del set

Balanza, platillo, protección del platillo, adaptador de CA


Dimensión de platillo

195×195

 mm

Dimensiones de embalaje

475×380×345

 mm

Masa neta

4,8

 kg

Masa bruta

6,3

 kg

Grado de protección

IP 54


Conectividad

2×RS232¹, USB-A, USB-B, Wi-Fi® (Opcional)


Alimentacion

Adapter: 100 – 240V AC 50/60Hz 0,6A; 12V DC 1,2A
Balanza: 12 – 15V DC 0,4A max


Potencia consumida por el dispositivo

4 W


Temperatura de trabajo

+10 – +40

 °C

Humedad relativa de aire

40% – 80%


CE
La repetibilidad se expresa como una desviación estándar de 10 posiciones de carga.
El tiempo de estabilización depende de las condiciones externas y la dinámica de colocar los pesos en el platillo; especificado para el perfil FAST.
1 Los lectores de códigos de barras disponibles como accesorio cooperan con la balanza utilizando solo la interfaz RS232.
Vídeos
Impresión fácil con las impresoras térmicas de recibos Wifi® de RADWAG
Connecting RADWAG RTP-UEW80 Printer via Wi-Fi® (Tutorial)
PS R2 Precision Balance Unpacking and Installation (Tutorial)
RTP - The First Receipt Printer of RADWAG Production!
Complete Solutions for Mass Measurement in Pharma Industry
R Series Laboratory Balances
Funciones
Autotest

Autotest

Diagnostic function aiming at metrological parameters determination (repeatability), the parameters are determined for the actual conditions of use. When speaking of repeatability it may be also used for weighing time optimization. Autotest is operated in an automatic mode thus operator’s time is saved.
Dosing

Dosing

Weighing process for which reference mass has been determined together with tolerance for its determination. Dosing tolerance is given in [%] and it is calculated in relation to the reference value thus being a permissible deviation of this process. This solution is used for weighing powders, liquids and loose materials. Dosing function performance is often supported with bargraph - load indicator. For industrial scales it is possible to use a control systems of dosing process.
Percent Weighing

Percent Weighing

Percent Weighing function is used for comparision of measured products with mass standard. Mass of a mass standard may be a numeric value taken from a database or it may be determined through a measurement process. Each measured product is compared to mass standard, mass of which is presumed as a model 100% ideal mass. For products weighing less than the mass standard, obtained results are lower than 100%, for products weighing more, the obtained results are greatly  exceeded.
Totalizing

Totalizing

Function adding new mass value to already obtained one. This allows to determine mass content of the mixture, being a composition of number of different consistence components. Totalizing is limited by maximum capacity parameter.
Parts counting

Parts counting

Function using mass measurement for determination of  measured items quantity. Mass of a single item is required for this process. It may be either estimated through weighment or taken from a database. For items counting the following algorithm is used: all items mass / single item mass = quantity. Function operation is supperted by a mechanism of Automatic Correction of Accuracy. This allows to update single item mass in course of the process. To a certain extend Automatic Correction of Accuracy eliminates error which may be a result of different mass values of seemingly alike single elements. For industry solutions items counting may be simultaneously carried out with checkweighing and dosing thus industry solutions feature audio signalling base informing that specified number of items has been weighed. It is possible to apply weighing systems using few platfroms of different MAX capacities and different accuracies.
Peak hold

Peak hold

Function registering the greatest temporary indication occurring in course of the weighing process. It is most often used in medical scales in order to hold the measurement indication.
Statistics

Statistics

Statistiscs function registers and analyses performed measurements. This supplies the user withthe following information: Max and Min standard deviation, average value, variance, range et.
Checkweighing

Checkweighing

Checkweighing function is used for checking whether the measured sample mass is within the predefined threshold values, Low [LO] and Hgh [HI]. The thresholds are given in [g] and [kg] units. Current state of a sample being measured is signalled by means of pictorgams located on a display for laboratory balances, for industrial scales Stackligt System is used. This visual +/- inspection is in operation during segregation, control or packing process of products for which mass has bees determined with a specifaied tolerance, eg. 12860 g 961
Under-pan weighing

Under-pan weighing

The solution enables weighing with use of a stand, which is advisable for loads of non-standard shapes and dimensions and those that generate magnetic field.
GLP Procedures

GLP Procedures

Diagnostic function allowing to objectively document performed measurements. GLP procedures may be either presented in a short report form or extended one.
Animal weighing

Animal weighing

Process of mass determination for a product which may unwillingly reposition within the weighing pan. Mass determination in such cases requires much longer period of time when compared to typical weighing process. It is the user who defines period of time needed for control of measured product mass. The user can thus optimize the function depending on the measured product characteristics.
Density determination

Density determination

Liquid or solid body density function uses the Archimedes principle and it requires a special kit to be applied. The kit when used, replaces a weighing pan. For solids mass of the sample must be determined first in the air, next in the liquid of specified density. For liquids the so called sinker, density of which has been determined, must be measured first in the air, next in the tested liquid. The density determination process is disturbed by air bubbles which may stick either to the measured sample or the sinker. In case of laboratory equipment very light solids may be measured. For industry, solid bodies density may be determined by means of  under-pan weighing. Tested load of significant size may be measured this way.
Documentación
Tarjetas de productos
Data Sheet Data Sheet
Data Sheet

Ver
Ver
Guardar
Guardar

Choose more product:
Ver Ver GuardarGuardar
Manual de usuario
Manual de instrucciones - Balanzas de la serie R
Ver
Ver
Guardar
Guardar
(2.42 MB)
Declaraciones de conformidad
Conformity Declaration
Ver
Ver
Guardar
Guardar
(0.04 MB)
Publicaciones y folletos
Laboratory balance cleaning
Ver
Ver
Guardar
Guardar
(2.52 MB)
RTP Thermal Receipt Printer
Ver
Ver
Guardar
Guardar
(1.64 MB)
Communicacion Directa Balanza-PC
Ver
Ver
Guardar
Guardar
(0.32 MB)
Alibi Reader - tutorial
Ver
Ver
Guardar
Guardar
(1.47 MB)
Laboratory Balances
Laboratory Balances
Ver
Ver
Guardar
Guardar
(1.68 MB)
Stainless Steel in RADWAG products. Standard and special applications
Ver
Ver
Guardar
Guardar
(2.23 MB)
Perfiles Definidos
Perfiles Definidos
Ver
Ver
Guardar
Guardar
(1.65 MB)
Balanzas de la Serie R
Ver
Ver
Guardar
Guardar
(3.50 MB)
Programas
Drivers

RADWAG USB DRIVER 1.6.2 (1.25 MB)

Accesorios
R-LAB

Accesorios

Newsletter

Suscríbete al newsletter si quieres recibir información sobre las novedades de RADWAG.

Ver más
RADWAG Balanzas Electrónicas
Torunska 5
26-600 Radom
Poland
tel.: +48 48 386 60 00
e-mail: export@radwag.com
TIN: PL7960000327
Vimeo Radwag YouTube Radwag Facebook Radwag LinkedIn Radwag
© 2025 RADWAG Balances and Scales. All rights reserved.

Selecionar idioma

×
Change language AlbanianAlbanian
Change language DanishDanish
Change language NederlandseNederlandse
Change language EstonianEstonian
Change language FinnishFinnish
Change language HungarianHungarian
Change language IcelandicIcelandic
Change language KazakhKazakh
Change language LatvianLatvian
Change language LithuanianLithuanian
Change language MacedonianMacedonian
Change language NorwegianNorwegian
Change language PortuguesePortuguese
Change language RomanianRomanian
Change language RussianRussian
Change language SlovakSlovak
Change language SlovenianSlovenian
Change language SwedishSwedish
Change language UkrainianUkrainian
Change language SerbianSerbian
Change language MontenegrinMontenegrin
Change language page on Deutsch Deutsch
Change language page on English English
Change language page on Français Français
Change language page on Italiano Italiano
Change language page on Polski Polski
Change language page on Türkiye Türkiye
Česky
Português (Brasil)
Change website to USA USA
Change language page on 中文 中文
Presentations Presentations Presentations
Subscribe Subscribe Subscribe
Radwag in Facebook Radwag in Facebook Facebook
Radwag in YouTube Radwag in YouTube Youtube
Radwag in Vimeo Radwag in Vimeo Vimeo
Radwag in LinkedIn Radwag in LinkedIn LinkedIn
Webinars Radwag Webinars Radwag Webinars
close
E-mail:
Nombre de empresa
Nombre:
I consent to the processing of my personal data for marketing purposes by Radwag Wagi Elektroniczne Witold Lewandowski.
I consent to receive marketing and product-related messages by electronic means from Radwag Wagi Elektroniczne Witold Lewandowski.
I have read the Privacy Policy of RADWAG Wagi Elektroniczne Witold Lewandowski.
lock_openI want to access the files
close
Slide to go back ↩
close